
A gray, dull steak makes every barbecue a letdown. Without the right sear, flavor fades and texture feels off. Guests leave hungry and disappointed.
The best way to get a steakhouse sear on a gas grill is by preparing meat at room temperature, preheating the grill, drying the surface, and using high heat with clean grates.
A sear is more than looks. It is the difference between ordinary and unforgettable meals. If you want the same crust and tenderness found in restaurants, here is the step-by-step guide.
Bring Your Food to Room Temperature
Cold meat on the grill often turns tough outside while staying raw inside. That ruins both taste and texture.
Letting meat rest at room temperature for 20–30 minutes helps it cook evenly and sear faster without overcooking the surface.

Why temperature matters
The fibers in cold meat tighten quickly when exposed to flame. This squeezes juices out and leads to dry bites. By resting meat before grilling, the fibers relax and hold more moisture.
Common mistakes to avoid
- Putting frozen or chilled meat directly on hot grates
- Skipping the rest period after removing from the fridge
- Ignoring thickness differences (thin cuts need less time, thick cuts need more)
Quick reference table
| Cut type | Resting time before grilling | Result on grill |
|---|---|---|
| Thin steak (1 in) | 20 minutes | Even sear, tender bite |
| Thick steak (2 in) | 30–40 minutes | Balanced crust and center |
| Frozen meat | 1–2 hours in water bag | Avoids uneven cooking |
By giving meat this simple rest, you raise your chance of hitting that golden crust with a juicy middle.
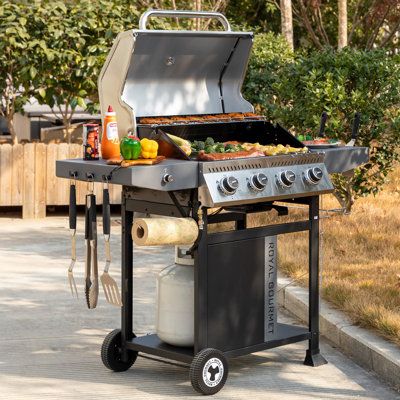
Clean the Grates
Grimy grates block heat transfer and stop sear marks from forming. Burned leftovers also add bitter flavors.
Scrubbing grates with a brush or vinegar before preheating ensures direct contact between metal and meat, producing defined sear lines and clean taste.

Why clean grates make a difference
Searing needs direct contact between food and hot metal. If grease or residue remains, the meat sits on waste instead of steel. Heat transfer weakens and grill marks fade.
Cleaning methods
- Wire brush after preheating
- Vinegar spray for stubborn grease
- Commercial grate cleaner for heavy buildup
Safety tip
Always brush while grates are hot, but use long-handled tools. Wear gloves if needed to prevent burns.
Clean grates give you more than just looks. They stop flare-ups and let every bite taste fresh instead of smoky ash.
Dry and Season the Meat
Wet surfaces steam instead of searing. That kills crust formation.
Patting meat dry with paper towels and seasoning with salt and pepper allows the surface to caramelize into a crisp crust instead of boiling away.
Moisture control
When liquid touches hot grates, it evaporates fast. The energy goes into drying water, not browning meat. By drying first, you let heat focus on the Maillard reaction.
Role of seasoning
Salt draws out some surface moisture, leaving a tacky layer that binds seasonings and forms a crust. Pepper adds flavor but should be applied just before grilling to avoid burning.
Seasoning guide
| Seasoning | When to apply | Effect |
|---|---|---|
| Salt | 30 minutes before | Pulls out water, helps crust |
| Pepper | Just before grilling | Adds heat, avoids burning |
| Garlic/Herbs | After sear or in butter | Preserves flavor |
Dry, seasoned meat sears faster, crusts deeper, and stays juicy inside.
Preheat and Use Two Zones
Searing needs maximum heat from the start. Many gas grill users forget this step.
Preheating on high with the lid closed for 15 minutes, then creating a direct and indirect zone, gives control for both crust and doneness.

How to set two zones
- Turn burners on one side to high for searing
- Keep the other side low or off for finishing
- Sear over direct flame, then move to indirect side
Heat targets
- Preheat: 500–550°F at grate level
- Sear: 2–3 minutes per side depending on thickness
- Finish: indirect heat until internal target temperature
Doneness guide
| Doneness | Target internal temp | Finish method |
|---|---|---|
| Rare | 125°F | Brief indirect |
| Medium rare | 135°F | Indirect for a few minutes |
| Medium | 145°F | Indirect longer |
| Well done | 160°F | Indirect until full cook |
Two-zone grilling makes searing safe and repeatable. It prevents burned outside with raw inside.
Keep Your Grill in Good Condition
Even the best method fails if the grill is weak. Poor burners or blocked ports lower heat.
Checking for proper flame, replacing faulty parts, and keeping burners clear ensures the grill reaches the searing heat needed for steakhouse crust.
Signs your grill may not perform
- Flame turns yellow instead of blue
- Hot spots or uneven cooking
- Temperature fails to pass 450°F
Fixes
- Clean burner tubes with a brush
- Replace rusted or clogged burners
- Check propane level or gas line leaks
A grill in good condition is not optional. Without strong heat, no technique will deliver real sear marks.
Conclusion
Perfect sear comes from heat, prep, and clean technique. Practice these steps to cook like a steakhouse at home.
FAQ
What temperature should my gas grill reach to sear steak?
For best sear, the grate temperature should be 500–550°F. Anything lower will brown slowly and lose crust quality.
How long should I sear steak on a gas grill?
Most steaks need 2–3 minutes per side over high heat. Thicker cuts may need longer with indirect finishing.
Can I sear chicken or pork on a gas grill the same way?
Yes, but times vary. Chicken and pork need longer indirect finishing to reach safe internal temperatures.
Should I oil the grates before searing?
Yes, use high-smoke point oil like canola or grapeseed. Apply with a paper towel to stop sticking.
What is reverse searing, and is it better?
Reverse searing cooks meat at low heat first, then finishes with a sear. It creates even doneness and a strong crust.
Do I need special burners to sear on a gas grill?
No, but infrared burners can help reach higher temperatures faster. Regular burners work if preheated well.
Why should I let steak rest after grilling?
Resting allows juices to redistribute inside. Cut too early and the juices run out, leaving the steak dry.
What causes flare-ups during searing?
Excess fat or grease dripping onto burners. Trim fat, clean grates, and move steak if flames rise too high.