

You want juicy steaks with a rich, caramelized crust? Just fire up your gas grill sear burner, let it get blazing hot, and place your steak right on the burner. Holagrills makes this process super simple, whether you use a built-in or free standing grill. You’ll get bold flavor and that steakhouse texture every time. You don’t need to be a chef—just trust your grill and enjoy the results!
Key Takeaways
- Preheat your grill and sear burner to 450°F-500°F for the best crust on your steak.
- Always season your steak with salt and pepper before grilling to enhance flavor.
- Sear each side of the steak for 1-3 minutes to achieve a rich, caramelized crust.
- Let your steak rest for about 5 minutes after cooking to keep it juicy and tender.
- Use a meat thermometer to check doneness: 125°F for rare, 135°F for medium-rare, and 160°F for well-done.
What Is a Gas Grill Sear Burner?
You might wonder what makes a gas grill sear burner so special. This feature is a game-changer for steak lovers. Holagrills includes sear burners in both built-in and free standing gas grills, so you can enjoy restaurant-quality results right at home.
How a Sear Burner Works
A sear burner is all about high heat and fast action. When you turn it on, you get a super-hot zone that quickly caramelizes the outside of your steak. Here’s how it works:
- The sear burner uses three to four burners placed close together.
- This design creates a hotter area than regular grill burners.
- You get a caramelized crust while the inside stays juicy and tender.
Holagrills engineers their sear burners for maximum heat and even distribution. You just set your steak on the burner, and the magic happens in minutes.
Why Sear Burners Are Great for Steaks
Searing is more than just making grill marks. It’s a science that boosts flavor and texture. When you use a gas grill sear burner, you trigger the Maillard reaction. This process happens when high heat meets the proteins and sugars in your steak, giving you a rich color and mouthwatering aroma.
Let’s compare searing with oven cooking:
| Cooking Method | Temperature (°C) | Flavor Compound Increase |
|---|---|---|
| Searing | 232 | 5 times higher |
| Oven Cooking | 177 | Lower |
| Effect | Searing | Oven Cooking |
|---|---|---|
| Juiciness | No change | No change |
| Surface Color Change | Yes | No |
| Flavor Improvement | Yes | No |
You also help the environment when you use a gas grill sear burner. Gas grills burn cleaner than charcoal, so you get fewer emissions and better air quality. Holagrills designs their grills to be efficient and eco-friendly, so you can feel good about every cookout.
Tip: If you want steakhouse flavor at home, always use the sear burner for the first few minutes. You’ll notice the difference in taste and texture.
How to Use a Sear Burner for Steaks

Ready to master steak night? You can get steakhouse results at home with your gas grill sear burner. Holagrills makes it easy, whether you have a built-in or free standing model. Let’s walk through each step so you know exactly how to use a sear burner for perfect steaks.
Preheat the Grill and Sear Burner
Start by preheating your grill. This step is key for a great crust. Turn on your sear burner and light the sear station. Wait until the temperature reaches the best temperature for steaks. You want the grill to hit between 450°F and 500°F. High heat gives you a beautiful sear and keeps the inside juicy.
- Set your sear burner to high.
- Wait until the grill thermometer reads 450°F to 500°F.
- Let the sear station heat for several minutes for even heat.
Tip: Preheating helps the Maillard reaction, which gives your steak that rich brown color and bold flavor. If you skip this step, you won’t get the crust you want.
Safety matters, too. Before you start, check your gas hoses and connections for cracks or wear. Use a soap test to spot leaks. Keep a fire extinguisher nearby and wear heat-resistant gloves. Holagrills grills use sturdy construction and smart grease management to help prevent flare-ups.
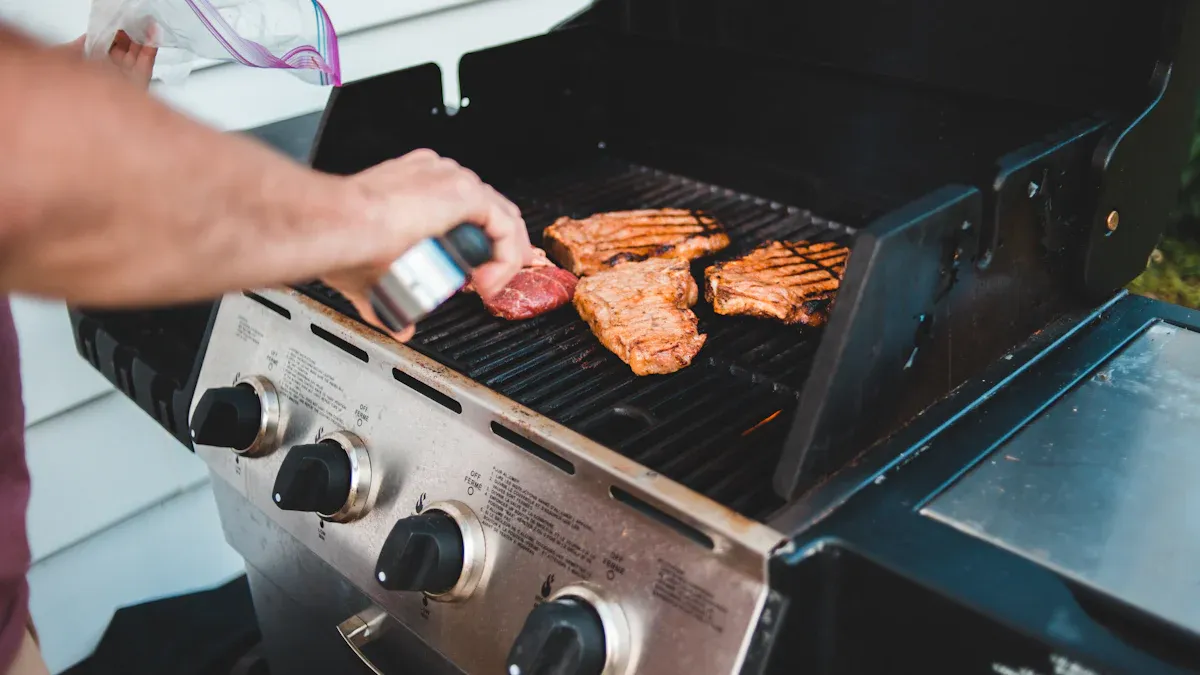
Prepare and Season the Steak
While your sear burner heats up, get your steak ready. Take the steak out of the fridge and let it reach room temperature. This helps it cook evenly and stay juicy. Pat the steak dry with paper towels. Moisture on the surface can stop the crust from forming.
Sprinkle salt and pepper on both sides. You can add garlic powder or your favorite steak rub if you like. Don’t forget to use a little oil to help prevent sticking.
| Step | Why It Matters |
|---|---|
| Room temp steak | Even cooking, juiciness |
| Pat dry | Better crust |
| Season well | Boosts flavor |
Note: If you want extra flavor, try the salt rest technique. Sprinkle salt on the steak and let it sit for 10-15 minutes before grilling.
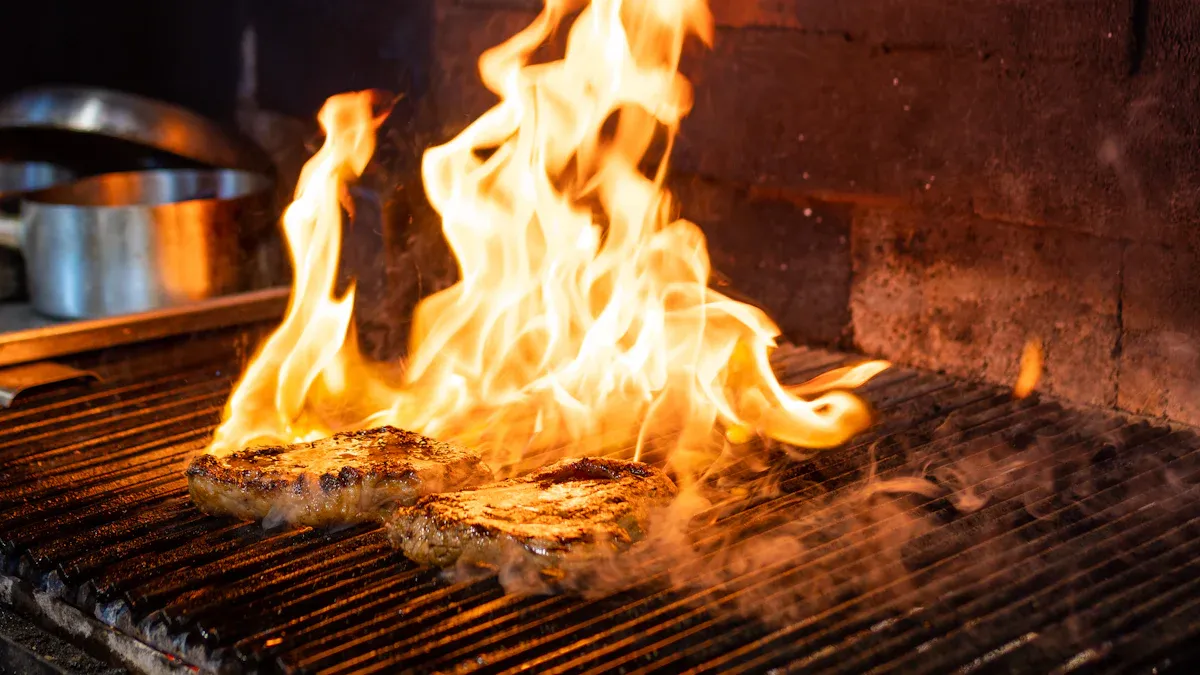
Sear the Steak
Now it’s time to use a sear burner. Place your steak right on the hottest part of the sear station. Keep the lid open so you can watch the crust form. Sear each side for 1-3 minutes. You want a deep brown color and grill marks.
- Sear one side for 1-3 minutes.
- Flip and sear the other side for 1-3 minutes.
- Move the steak to a cooler part of the grill if you want it cooked past rare.
Tip: Don’t press down on the steak. Let the heat do the work. If you want medium or well-done, finish the steak over indirect heat after searing.
Finish and Rest the Steak
Once you finish searing, move the steak off the sear burner. Place it on a warm plate or a cooling rack. Tent it loosely with foil. Let it rest for about 5 minutes per inch of thickness. Resting lets the juices spread out, so every bite is tender and juicy.
- Rest on a cooling rack or warm plate.
- Tent with foil to keep heat in but avoid steam.
- Use a meat thermometer to check doneness.
Tip: Resting is just as important as searing. If you cut into the steak too soon, the juices will run out. Give it time to settle for the best flavor and texture.
Holagrills grills make this process simple. Their reliable ignition systems, sturdy build, and smart grease management help you grill safely and confidently. Now you know how to use a sear burner for steaks that wow your guests every time.
Tips to Use a Sear Burner Like a Pro
You want to grill like a steakhouse chef? You can do it with a few smart moves and the right Holagrills accessories. Let’s break down some pro tips so you get the most out of your gas grill sear burner.
Check Steak Doneness
You don’t have to guess when your steak is ready. Use a meat thermometer for perfect results every time. Stick it into the thickest part of the steak. For rare, look for 125°F. Medium-rare hits 135°F. Medium goes to 145°F. If you want well-done, aim for 160°F. Holagrills offers handy grill thermometers and instant-read probes that make this step easy.
Tip: Always let the steak rest after you light the sear station and finish cooking. Resting helps the juices spread out, making every bite tender.
Try the Reverse Sear Method
Want a steak that’s juicy and evenly cooked? Try the reverse sear method. Start by cooking your steak over low heat until it’s almost done. Then, light the sear station and finish with a quick blast of high heat. This method gives you a perfect crust and keeps the inside tender. Reverse searing works better than traditional searing because it avoids overcooked edges and locks in moisture.
- Reverse searing creates a more tender steak.
- You get even doneness from edge to edge.
- The crust forms fast when you use the sear burner.
Avoid Common Mistakes
You can avoid most grilling problems with a few simple steps. Here are the top mistakes and how to fix them:
- Use high heat when you light the sear station. Low heat won’t give you a good crust.
- Always thaw and dry your steak before grilling. Wet or frozen meat cooks unevenly.
- Season your steak before you use the gas grill sear burner. Salt and pepper boost flavor.
- Let your steak rest after cooking. This keeps the juices inside.
| Issue | Troubleshooting Steps |
|---|---|
| Burners not lighting | Clean burner ports, check igniter, inspect gas supply |
| Weak flame | Clean ports, check gas lines, adjust air shutter |
| Knob problems | Check alignment, inspect control valves |
Note: Clean your Holagrills sear burner often. Check for gas leaks with soapy water. Make sure airflow is clear for safe grilling.
You can also try advanced techniques like the Afterburner or Stripsteak methods for restaurant-quality results. Holagrills grill accessories, like rotisserie kits and smoker boxes, help you level up your steak game.
You can master steak night with your gas grill sear burner. Just follow these simple steps:
- Preheat your grill for 10-15 minutes.
- Season your steak with salt and pepper.
- Place your steak on the grill using tongs.
- Sear your steak for 1-3 minutes per side.
- Finish cooking on a cooler part of the grill and check doneness.
- Let your steak rest under foil.
- Slice and serve for tenderness.
Here’s what you get when you use a sear burner:
| Benefit | Description |
|---|---|
| Flavor Enhancement | You get a deep, savory taste from caramelization. |
| Texture and Appearance | Your steak has a crisp crust and looks amazing. |
| Retaining Juiciness | The crust helps keep the inside juicy and flavorful. |
“Holagrills sear burners heat up fast and lock in juices, making steak prep quick and delicious. You save time and get a perfect sear every time.”
Try these steps with Holagrills built-in or free standing grills. You’ll love the results and impress your guests. Fire up your grill and turn your patio into a chef’s station!
FAQ
How do I clean my grill after using the sear burner?
Let your grill cool down. Use a grill brush to scrub the grates. Wipe away any leftover grease. You can remove the drip tray and wash it with warm, soapy water.
Can I use the sear burner for other foods besides steak?
Yes! You can sear chicken, pork chops, burgers, or even vegetables. The high heat gives food a crispy outside and keeps the inside juicy.
What is the best way to avoid flare-ups?
Trim extra fat from your steak before grilling. Keep your grill clean. If you see flames, move your food to a cooler spot until the fire dies down.
How do I know when my steak is done?
Use a meat thermometer. Stick it into the thickest part of the steak. Rare is 125°F, medium-rare is 135°F, medium is 145°F, and well-done is 160°F.